
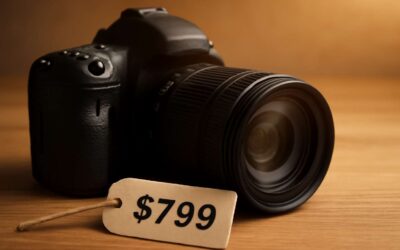
Choosing the right DSLR for beginners
What makes a DSLR beginner-friendly
South Africa’s photography scene is buzzing, with beginners turning the shutter into storytelling after picking up a forgiving DSLR. A local survey suggests about 57% of aspiring shooters credit a beginner-friendly model with boosting confidence. For a dslr camera beginner, prioritise intuitive menus, reliable autofocus, and a camera that feels like a partner rather than a gadget. It steadies your hand when light falters and makes missteps part of the lesson.
- Easy-to-use controls and guided modes that help beginners learn on the job
- Solid lens ecosystem and upgrade paths for growing skills
- Reliable autofocus and a sturdy build to handle day-to-day shooting in Cape light
Ultimately, the right fit feels honest—friendly enough to teach, robust enough to travel with you through wind, dust, and Cape sunsets. Observers have noted how beginner stories accelerate when the camera matches pace with curiosity, and the SA photography community makes every outing a shared, learning-filled adventure.
Key features to look for in entry-level DSLRs
South Africa’s budding shutterbugs respond to a camera that behaves like a trusted companion, not a puzzling gadget. A recent local survey notes that seven in ten aspiring photographers stay loyal to a model that proves intuitive and forgiving at first click—ideal for the dslr camera beginner.
When choosing, look for ease of use paired with real-world reliability. The best entry-level DSLRs offer a readable menu, solid autofocus, and a grip that fits a long day of Cape light without fatigue.
- Clear, logical menu structure with guides for beginners
- Responsive autofocus across common focal lengths
- Decent battery life and a robust, weather-tolerant body
- Expansive lens ecosystem and straightforward upgrade paths
That combo reads honest on the hand and friendly to travel, a boon for the dslr camera beginner seeking light and storytelling in one package, turning every outing into a nuanced, storytelling moment rather than a mere exposure measurement.
Popular beginner DSLR models in 2026
In South Africa’s vibrant photography circles, 68% of aspiring shooters gravitate toward a camera they can master in a weekend rather than wrestle with endless menus. The right start feels like a trusted companion that invites you to tell a story with light, not chase an ever-shifting checklist.
By 2026, three broad camps define popular beginner models: Canon’s user-friendly entry line, Nikon’s value-focused DSLRs, and rugged options from a few other brands. They share approachable handling and solid build, yet each path offers a distinctive balance of ergonomics and upgrade potential.
- Canon-style starter DSLR with intuitive controls
- Nikon-budget DSLR noted for reliable handling
- Rugged, weather-sealed options designed for travel and outdoor storytelling
For the dslr camera beginner, the choice should feel like a doorway to everyday storytelling rather than a test of endurance.
Where to buy and value for money
In South Africa, 68% of aspiring shooters want a camera they can master in a weekend, not wrestle with endless menus. The doorway to everyday storytelling should feel like a trusted companion that invites you to tell a story with light, not chase an ever-shifting checklist. For the dslr camera beginner, the right start is a blend of simplicity and room to grow.
Where to buy matters as much as what you buy. Seek channels that offer genuine value, clear warranties, and dependable after-sales support.
- Authorized local retailers with service centers
- Specialist camera shops and gear hubs
- Trusted online platforms with warranties and returns
Value comes from more than price. A balanced bundle—a solid kit lens, a sturdy body, and a reliable service network—lets you focus on storytelling rather than shopping. In South Africa, that mix often translates to better long-term value than chasing the latest spec bump.
Fundamental DSLR camera settings for newcomers
Mastering exposure: aperture, shutter speed, and ISO
Mastering exposure is where the dslr camera beginner takes control rather than letting light do all the talking. The trio of aperture, shutter speed, and ISO are the three dials that translate scenes into truth on your memory card.
Here are the core levers you’ll juggle, each with a clear consequence:
- Aperture (f-number): wider openings mean more light and shallower depth of field.
- Shutter speed: fast speeds freeze motion; slow speeds capture movement or blur.
- ISO: higher sensitivity lets you shoot in low light but can add grain.
When the light nudges you, the balance is found by how the three interact; too much aperture can soften a subject’s edges; higher ISO brings noise. In South Africa, practicing in varied light helps build intuition.
Understanding autofocus modes and metering
Smart beginners don’t wait for perfect light to strike a shot—they decide what sharp means. In South Africa’s varied light, a dslr camera beginner quickly grasps autofocus and metering as deliberate choices rather than luck.
Autofocus modes guide the camera toward what matters. Metering helps the camera judge light so your subject isn’t lost in the background.
- Autofocus: Single-shot AF (AF-S) for stationary subjects; Continuous AF (AF-C) for movement; Auto-area AF for general scenes.
- Metering: Matrix/Evaluative measures most of the frame; Centre-weighted eyes the center; Spot metering locks onto the smallest area.
Putting it into practice, a beginner picks a subject, tests AF mode, and checks the metering reading. The aim is steady, honest light in frame after frame.
White balance and color temperature basics
South Africa’s light is as mercurial as the savannah winds, and a sharp morning can soften by noon. For the dslr camera beginner, white balance becomes a compass, guiding skin tones and landscapes toward honesty amid shifting color casts.
Color temperature is the invisible painter behind every frame. The camera’s white balance tries to neutralize that color cast so white stays white, not yellow or blue. Common references in SA light include:
- 5200–5500K daylight
- 3200K tungsten
- 7000K shade/late afternoon
These basics echo beyond settings; they shape a photographer’s voice in a country where light tells stories from Cape Town to the Karoo. The balance between color, mood, and reality is where true intention lives.
Picture styles and shooting in RAW vs JPEG
Light in SA’s morning has a mercurial hand. For the dslr camera beginner, picture styles and RAW vs JPEG are not gimmicks but a compass—defining mood before a single frame is captured. “Color is memory you can edit later,” some voices remind us.
Picture styles encode tone: Standard, Neutral, Landscape, and Portrait bend contrast and skin tones. RAW captures the most data; JPEG applies in-camera processing. If you shoot RAW, you gain latitude in post; if speed and instant sharing are priorities, JPEG keeps things simple.
- Picture Styles to explore: Standard, Neutral, Landscape, Portrait
- RAW vs JPEG: data-rich files with post-editing latitude or ready-to-share JPEGs
- Shooting in RAW and evaluating WB in post helps tame SA light
Essential photography techniques for beginners with a DSLR
Composition rules everyone should know
“Composition is the quiet architect of a frame,” a lens-wielder once said. For the dslr camera beginner, the best shots arrive when light, space, and moment align. Great images emerge not from haste but from watching the scene breathe and choosing a frame that tells the story with balance.
Think in three acts: balance, rhythm, focus. The following rules help frame a story without clutter:
- Rule of thirds: place points of interest along grid lines for natural balance.
- Leading lines: roads, fences, or horizons guide the eye toward the subject.
- Framing and depth: add foreground elements to create space and dimension.
These cues translate streets, beaches, and cityscapes into readable narratives.
In bustling South African streets or golden savannas, what you omit shapes the shot as much as what you include. A DSLR gives you latitude to experiment with angles, distance, and light, turning everyday scenes into cinematic frames.
Lighting basics natural and artificial
Two-thirds of great shots in South Africa happen in the first 15 minutes of light. Light is the true currency, and in the hands of a dslr camera beginner that means learning to time your frame, not chasing every new gadget. The scene breathes when you strike the balance of light and composition.
Natural light basics: use the golden hour, avoid harsh noon sun, let shade carve softness; position subject to light from the side or back; angle windows; reflectors can double the light. For indoor shoots, use window light as a starter and bounce with a white board.
- Natural light considerations: angle, soften shadows, reflectors
- Artificial light foundations: small flash or LED panel, bounce to fill
With practice, the photographer learns to sculpt scenes rather than chase brilliance—and the journey from casual observer to capable frame-maker becomes obvious, even in Cape Town traffic or rural Karoo light.
Handling motion and stability with a camera
South Africa’s golden hour turns every frame into memory, and two seconds of steadiness decide the moment. Presence — not gadgets — carries the shot and keeps you honest with your subject.
Handling motion means reading the scene before you click: anticipate action and let a faster shutter render movement with grace. Stability comes from the body as instrument: breathe, steady your grip, and choose support when needed.
- Stance and grip that settle elbows in
- Breath control and trigger timing
- Support using a wall, strap, or tripod
As you drift from casual observer to frame-maker, Cape Town promenades and Karoo horizons become your classroom—the dslr camera beginner discovers poetry in motion and stillness alike.
Practical shooting exercises to practice
Every frame is a conversation in the golden hour, where light becomes a patient tutor. For the dslr camera beginner, practical shooting is a gentle apprenticeship that turns a Cape Town street or a Karoo horizon into a classroom.
Try these practical shooting exercises to train your eye and steady your hand:
- Story sequence: a moment told in three consecutive frames.
- Texture and line: close-ups of weathered wood, tile, or fabric, exploring contrast and depth.
- Natural light portraits: observation of mood shifts as light meets distance.
With patience, the camera becomes an extension of your breath, not a gadget—and South African landscapes reward your attention.
DIY beginner photography projects
Light is a patient tutor, and the dslr camera beginner learns to lean into it rather than fight it! In South Africa, where the dawn paints veld and township alike, a simple frame can carry a lifetime of meaning. Notice how corners soften, shadows fall, and distance changes mood. The essentials lie in observation, composition, and restraint—the art of saying more by showing less.
DIY projects for a beginner invite small, honest experiments that honor the scene, not the gear.
- Natural light as the main actor
- Steady stance and breathing to steady your hands
- Backdrops that whisper rather than shout
With patience, the craft becomes a quiet conversation between you and light.
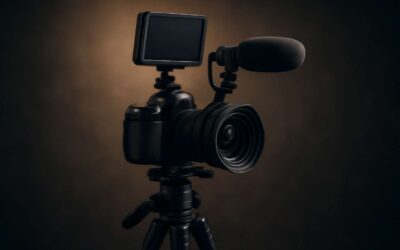
Gear and accessories to enhance a beginner DSLR setup
Lenses to consider for diverse subjects
Gear is not a cage but a compass for the dslr camera beginner. With patient hands and a few reliable companions—tripod, extra battery, and a robust memory card—the craft becomes tangible, a rhythm of light and shadow rehearsed in the field.
Lenses to consider for diverse subjects include:
- Standard prime (50mm) for portraits and intimate detail
- Wide-angle zoom (18-55mm or 10-22mm) for landscapes and architecture
- Telephoto (70-300mm) for distant action and candid moments
- Macro (100mm) for texture and close-up discoveries
A compact kit sustains momentum: a reliable memory card, spare battery, and a small bag that protects gear without weighing you down. Your craft deserves a dash of drama!
Tripods, SD cards, and batteries
As Ansel Adams said, ‘You don’t take a photograph, you make it.’ For a dslr camera beginner, steady hands and the right anchors get you there faster. A trusted tripod, a spare battery, and reliable SD cards turn improvisation into repeatable results. Gear is less about bragging rights and more about confidence—enabling you to slow down, frame thoughtfully, and let light do the talking.
Here’s a compact kit that travels well:
- Tripod: a sturdy, lightweight model that fits your travel style
- SD cards: Class 10 or UHS for quick writes and reliable buffering
- Batteries: spare NP-F or equivalent, with a compact charger
A lightweight bag protects gear without burden, keeping you ready for day-long shoots across Cape Town, the Winelands, or the Karoo. With the right basics, your photography feels less like luck and more like choice.
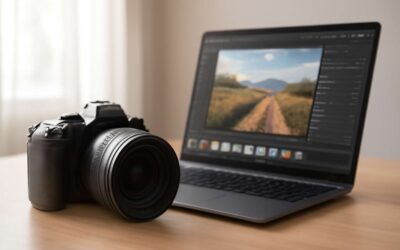
Understanding kit lens versus prime lenses
“The best camera is the one you have with you.” In South Africa’s golden hours, a dslr camera beginner learns to treat gear as a companion, not a trophy. A versatile kit lens keeps you moving—from the Cape Town waterfront to the Karoo—without constant lens swaps.
Understanding kit lens versus prime lenses helps you choose when to slow down and when to reach farther.
- Kit lens: flexible zoom range, ready for everyday scenes
- Prime lens: wide aperture, sharper corners, great for portraits and low light
- Accessory note: a compact bag and a small flash or LED light can extend shooting hours
Let curiosity guide the journey, and the dslr camera beginner finds that the right glass turns moments into deliberate, luminous stories.
Care and maintenance of your DSLR
The right tool helps you tell the story you’re already seeing. For the dslr camera beginner navigating South Africa’s golden hours, gear should feel like a loyal companion, not a trophy. A compact bag with a spare battery, a couple of fast SD cards, a microfiber cloth, and a small flash or LED light keeps you shooting from Cape Town’s waterfront to the Karoo without missing moments.
- spare battery
- memory cards (fast, high capacity)
- microfiber cloth
- compact flash or LED light
- lens cleaning kit
Care and maintenance keeps your gear reliable. Wipe lenses with a microfiber cloth, blow dust off the sensor area, and store in a dry bag with silica gel. Avoid extreme heat and humidity; never touch the sensor; power down before changing lenses; have a trusted sensor cleaning service periodically. For newcomers, regular care—cleaning lenses, checking mounts, and keeping firmware up to date—lets you trust your tool as you grow.
0 Comments